Silhouette Studio Know How - Make Your Own Rhinestone Image
- Maggie Reno

- May 19, 2011
- 3 min read
Stephanie contacted me yesterday with a question about Silhouette Rhinestones. She wants to make an image she has into a rhinestone file, so instead of just emailing a reply, I thought it would be helpful to many Silhouette users to post a tutorial on how to make your own rhinestone image!
HOW TO MAKE YOUR OWN RHINESTONE IMAGE
Let's begin with the simple details. Silhouette has 3 sizes of Rhinestones: 10ss, 16ss, and 20ss. That means you can choose from 3 different sizes, or a combination of the 3 to go in your very own image. I opened one of the Rhinestone images I have and found all 3 sizes in it. Instead of making you do the same - here is a Free Downloadable file with all 3 circle sizes. This will be your starting point!
1. Open the Rhinestone Sizes file in Silhouette Studio.

2. In a new window, open the image you want to turn into Rhinestones. This does not have to be a Silhouette Studio file, you could use a jpg file as your inspiration or anything else you can open in Silhouette. For this tutorial I'm going to use the Treble Clef from the "Musical Flourishes" file I bought.

3. Resize the image to the size you want your Rhinestone image. Remember the circles have to be a specific size for the rhinestones so you can't resize the image after you make it, you have to do it BEFORE!
4. Copy the circles from the Rhinestone Sizes file and Paste them to your newly opened image. (Drag over the circles to select them all, then hit Ctrl+C keys to copy, on the New image hit Ctrl+V to paste the circles.)

5. SAVE the new file now. Remember to save often as you work on images so you don't lose too much work!
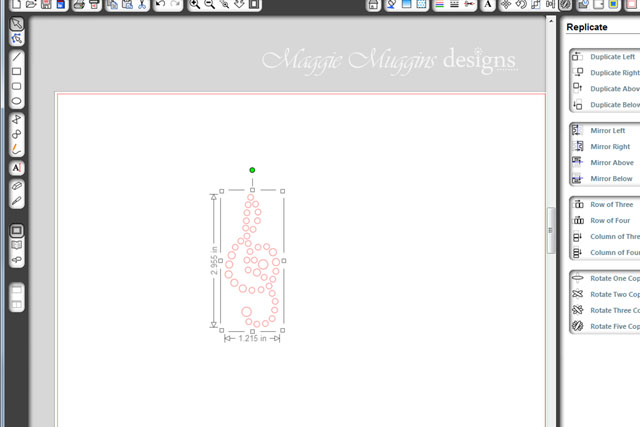
6. Now comes the work, you get to choose what size rhinestone you would like and where. I try to follow the original image design. Here I'm filling in the image the best I can, so I'm using all 3 sizes of Rhinestones.

Fill in your image with Rhinestone Circles. Try to evenly space your rhinestones (if you are following a straight line this can be made a lot easier by following this Silhouette Tutorial for Replicating an Image and choosing the space you want between the rhinestones). I leave the original circles in the corner until I'm all done. I just select the circle size I want and copy and paste it, then move it to the spot I want it.
Tip: Once you have copied a circle size you can re-paste it until you copy something else. (Don't keep going back to copy unless you need a different size.)
When you have two lines of rhinestones meeting up with each other don't forget to align the circle with both lines. In this case, I have several places where paths cross. I paste the circles and then fiddle around with them until it feels right. In the very center I decided not to try to align the paths, but focus on getting bigger circles in there to follow the image better.
If you're not sure about something just leave it and come back to that spot when you're finished the rest.
7. Once you have the image completely filled, deselect everything and look at the completed image. Move things around until you are completely satisfied.

8. Move the original image to the side. Compare the two images and make any changes you see necessary. I moved a few of the circles and decided to change the size of one of the circles to reserve the large ones for the end points only.

Can you see the difference in these two? It's small changes, but the After looks so much better to me.

9. Delete the original image and the Rhinestone Size circles.

10. Select all the circles. (Drag the mouse over all of them, or Ctrl+A.)

11. Group the circles. (Ctrl+G or Object->Group.)

Your image is complete! Don't forget to Save it again! Remember DO NOT RESIZE IT now or the rhinestone holes will be the wrong size.
Tip: If you have a larger image than what I showed you here you may want to do more than the outline - and actually fill the inside with rhinestones. I suggest looking online at the Silhouette images to get ideas for how to fill it. You can use straight lines, diagonal lines, chevron style, scattered rhinestones, or many other styles you can think of. It's your design so play around until you love it!
You can easily do this with fonts and add on simple words to your image! Notice how the "i" and the "n" are really similar? I copied the "i" and pasted it to start the "n"! When you're working with fonts, try to notice things that are the same. It will save you a lot of work!


Comments